#1 Accessing the battery and SIM slot
To access the battery and SIM slot on the Kona Micro first unplug the AC power and Ethernet connections. Next, remove the two Phillips screws on the back of the module. A Phillips #1 screwdriver is required to remove these screws. Once the screws are removed the battery cover will slide down and off the module. Do not remove the Torx screws holding the module together. The battery, if present, is connected to the module with a short cable. Pull vertically on the connector body, not the wires, to remove the connector and battery. The SIM slot is at the edge of the module housing. See Figure 1.
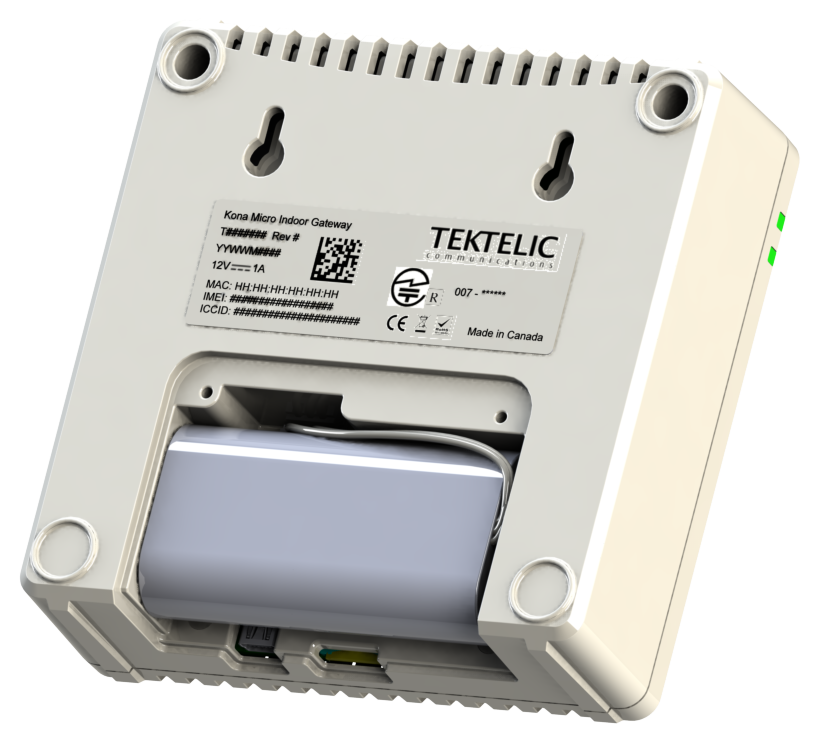
Figure 1: Battery and SIM area, battery cover removed
#2 Does the Kona Micro support LoRaWAN version 1.1?
The current Kona Micro GW is LoRaWAN 1.0.4 and LoRaWAN 1.1 compliant.
#3 Does Kona Micro have an internal LoRa antenna?
The Kona Micro GW has an external LoRa antenna which is supplied with each GW and has a peak gain of 1 dBi.
#4 Can the Kona Micro be powered by USB – 5V/500mAh?
No, the Kona Micro GW is powered by a 12V, 1A AC-DC power adapter, supplied with each GW.
#5 What is the Kona Micro Battery Capacity?
The Kona Micro backup battery capacity is 2600 mAh, 18.72Wh The battery provides approximately 4 hours of backup power. The backup battery is optional and must be purchased from TEKTELIC.
#6 What if I see high rate of CRC failure on a set-up that includes Kona Micro GW and Tektelic sensor?
One of the reason for high rate of CRC failure is the difference in the number of channels supported by Kona Micro GW and Tektelic Sensors. While Kona Micro GW supports 8 channels, 64 channels are supported by Tektelic Sensor. Therefore, it is recommended to set the Default channel mask on sensor for 8 channels at the device level in the Advanced Network Settings tab (shown in screenshot below) from Tektelic NS.
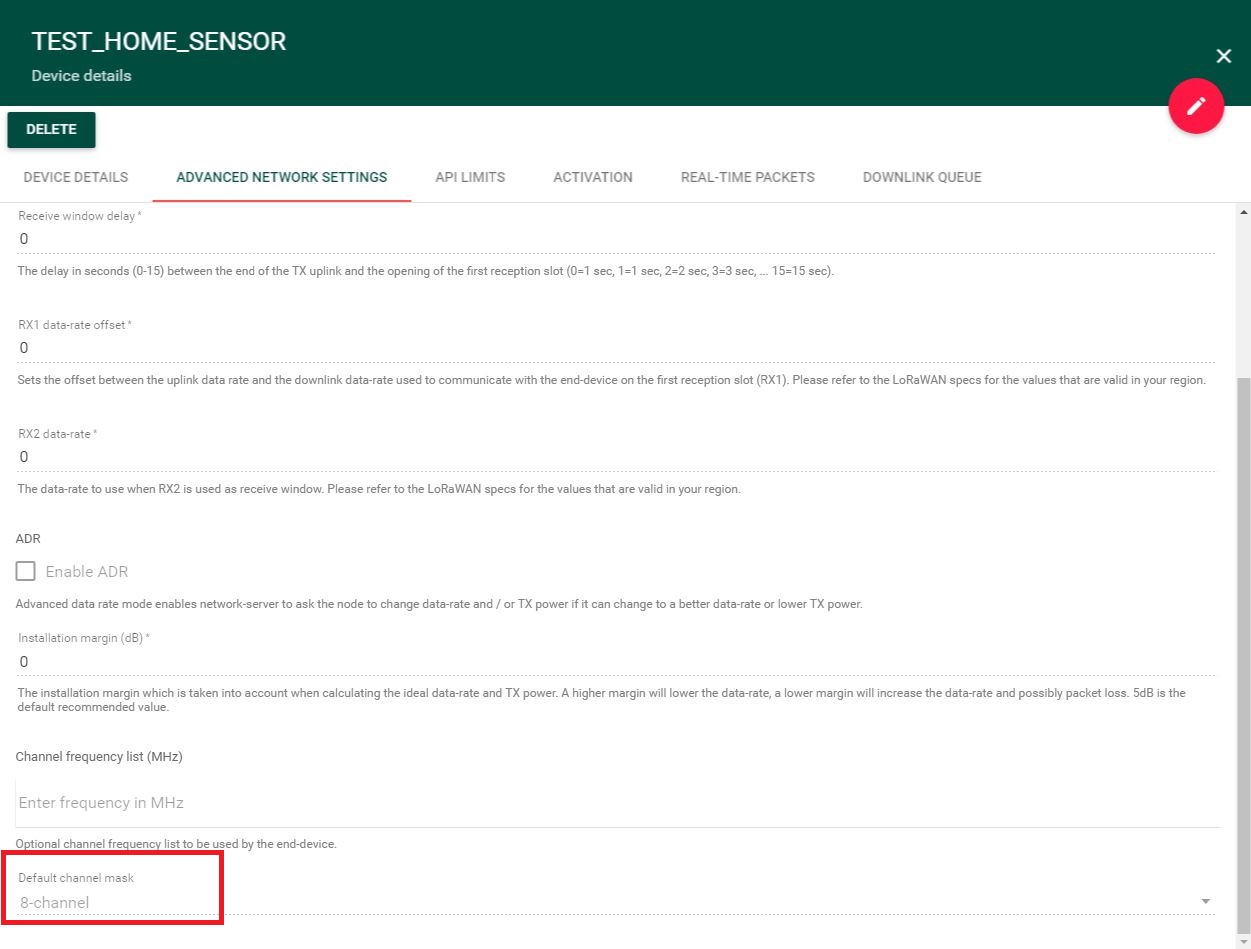 Figure 2: Setting up Default Channel Mask for Sensor
#7 How can I install and run Loriot PF on my Kona Micro GW?
Please see the LORIOT section found in the FAQ here.
#8 How can I use Spectral Scan feature on Kona Micro GW on Tektelic NS?
- Spectral Scan option available on Tektelic NS is an OAM enabled function. Therefore, Tektelic MQTT Bridge must be installed and configured on Kona Micro GW.
- In order to ensure Tektelic MQTT Bridge is running on Kona Micro GW, you can click on Gateway Information tab and check if GW information is showing up.
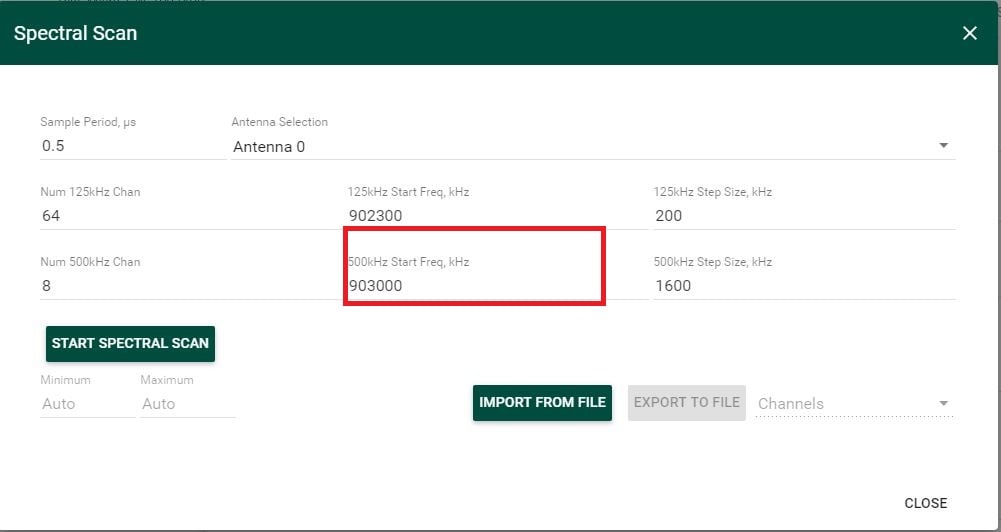
- Once you make sure MQTT Bridge is running, click on Spectral Scan option, which will open up a window as shown below. ( NOTE: Below screenshot is for North American Kona Micro GW.)
-
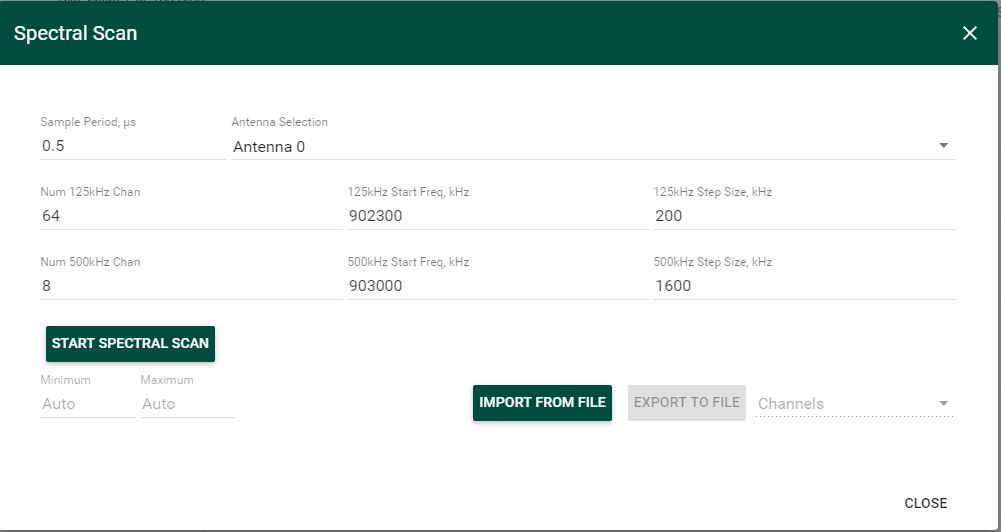
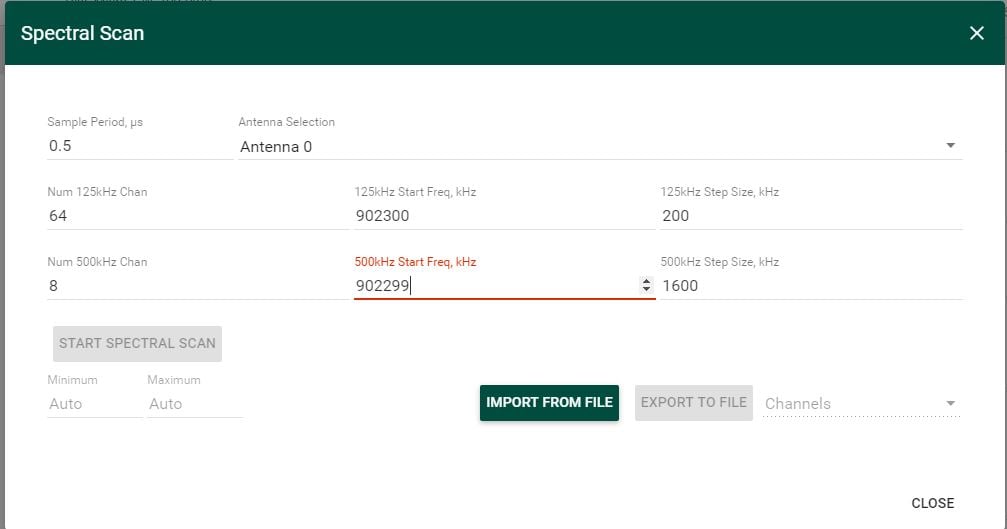
Note that 500KHz Start Freq, kHz field must have frequency at least equal to or greater than that entered in 125KHz Start Freq, kHz.
- Violating this condition will disable Start Spectral Scan option in the screen as shown below.
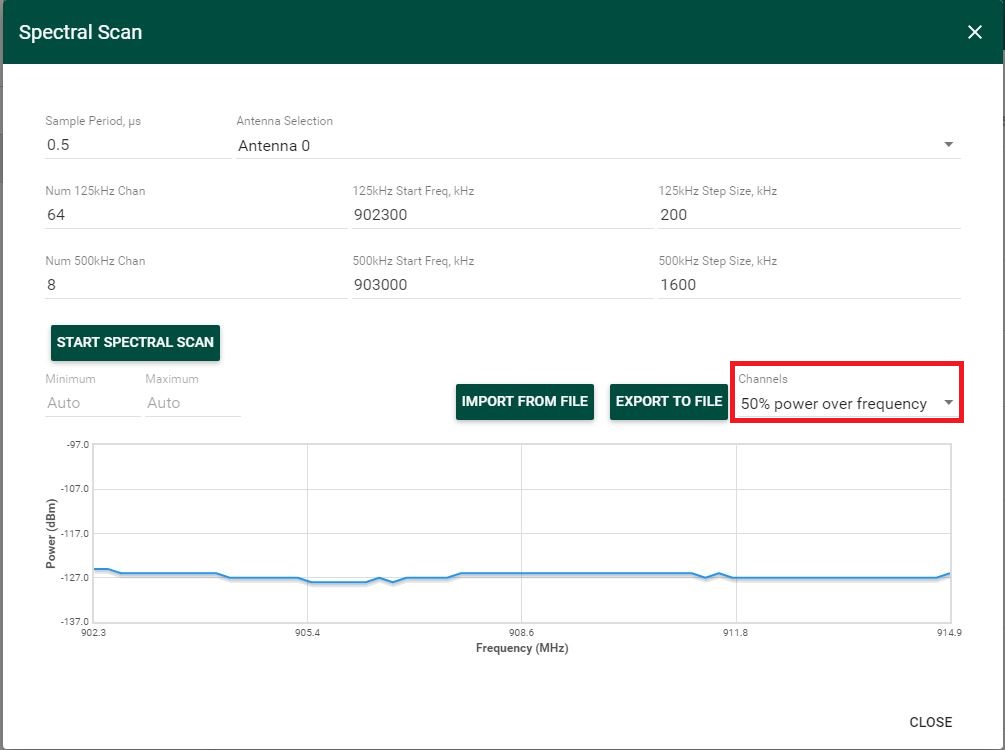
- Upon entering the information in different fields properly, click on Start Spectral Scan to see Frequency versus Power graph. Wait until the progress bar on top indicates the completion. You shall be able to see the graph below.
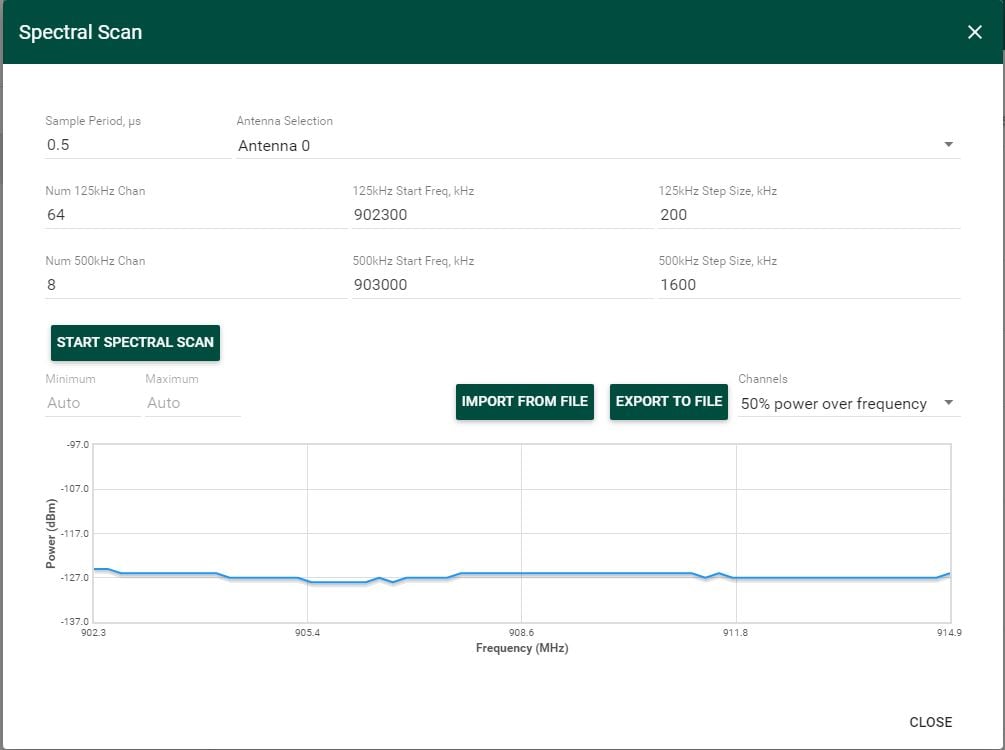
- You can also select the particular channel's spectral scan by selecting that channel from Channels drop down menu.